 Save
Save The first time I watched my grandmother make broth from nothing but peels and ends, I thought she'd lost her mind. We'd just prepped vegetables for Sunday dinner, and there she was, carefully tucking onion skins and carrot trimmings into a freezer bag like they were precious jewels. That winter afternoon, our tiny apartment filled with the deepest, most comforting aroma I'd ever experienced. Now I'm the one hoarding vegetable scraps in ziplock bags, and my roommates think I'm the strange one.
Last February, during that miserably cold week when everyone seemed to be fighting off something, I made a triple batch. My friend stumbled in, red-nosed and shivering, and I pressed a steaming mug into her hands. She took one sip and looked at me like I'd performed magic. Sometimes the most powerful healing comes from the things we almost threw away.
Ingredients
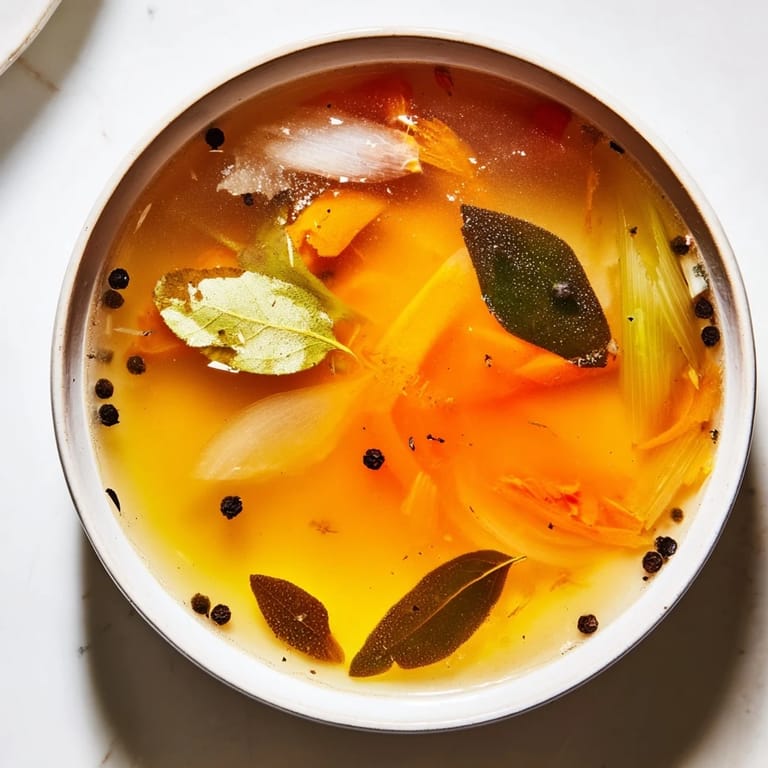
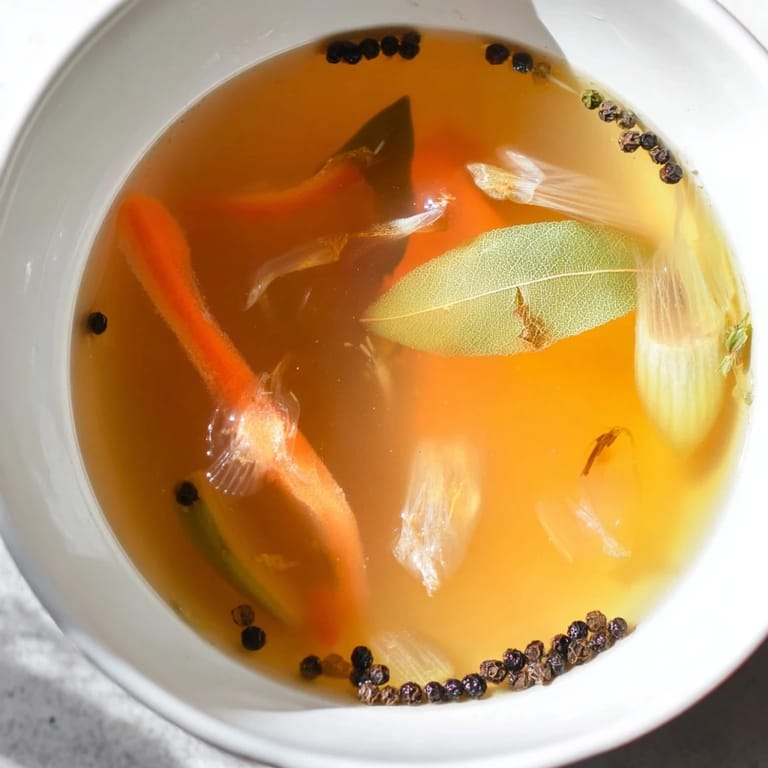
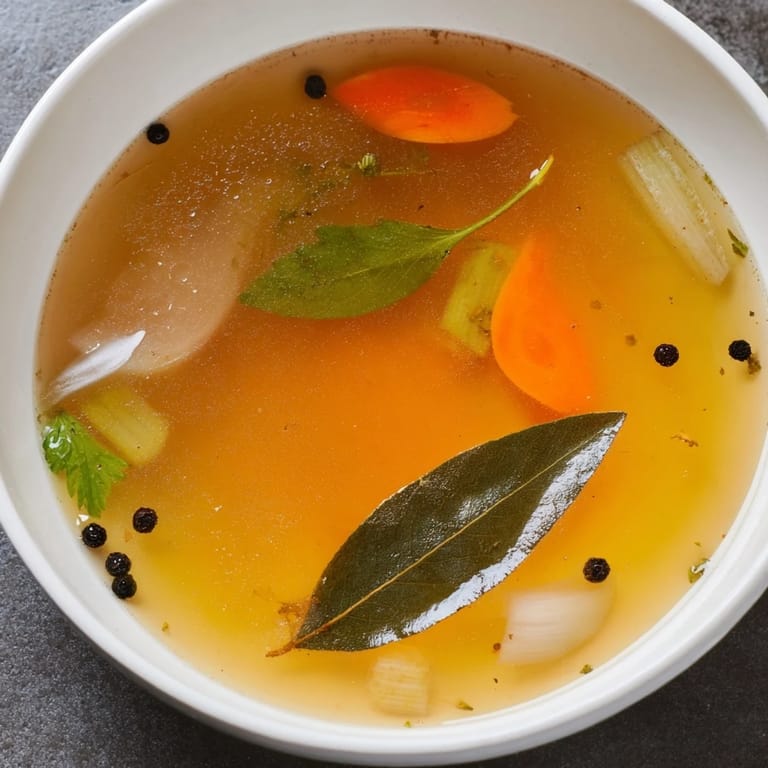
- Vegetable Scraps (56 cups): The foundation of everything, so save those carrot peels, onion skins, celery ends, leek tops, mushroom stems, garlic skins, and parsley stems like they're going out of style
- Bay Leaves (2): These add that subtle earthy depth that makes homemade broth taste professional
- Black Peppercorns (810 whole): Freshly cracked gives the best warm undertone
- Garlic (2 cloves, optional): Smash them with the back of your knife to release all their oils
- Fresh Parsley or Thyme (small handful): Either works beautifully, or use both if you have them handy
- Salt (12 teaspoons): Start with less and adjust at the end, you can always add more
- Cold Water (2 liters): Cold water helps extract flavors more gradually than hot
Tired of Takeout? 🥡
Get 10 meals you can make faster than delivery arrives. Seriously.
One email. No spam. Unsubscribe anytime.
Instructions
- Gather Your Scraps:
- Pull out your collection of vegetable trimmings from the freezer or grab fresh ones from today's prep
- Combine Everything:
- Place scraps, bay leaves, peppercorns, smashed garlic, herbs, and salt into your largest pot
- Add Cold Water:
- Pour in enough cold water to cover everything by about an inch
- Bring to a Gentle Boil:
- Turn the heat to medium-high and watch for bubbles to start dancing across the surface
- Reduce to Simmer:
- Lower the heat and let it bubble gently, uncovered, for a full hour
- Skim as Needed:
- Use a spoon to remove any foam that rises to the top while simmering
- Taste and Adjust:
- Add more salt if it needs that extra depth, though it should be subtle
- Strain Carefully:
- Pour through a fine-mesh sieve or cheesecloth into a large bowl or container
- Cool and Store:
- Let it cool completely before refrigerating for up to 5 days or freezing for 3 months
 Save
Save  Save
Save There's something profoundly satisfying about turning what would have been compost into something that nourishes. My brother still doesn't understand how my soups taste so good, and I just smile and stir the pot.
Building Your Scrap Collection
Keep a large freezer bag dedicated to vegetable trimmings and add to it throughout the week. When it's full, you know it's broth-making time. The best scraps come from carrots, onions, leeks, celery, garlic, and mushrooms, but potato peels work well too as long as they're not green.
Flavor Variations to Try
For a deeper umami flavor, add a piece of kombu seaweed or some dried shiitake mushrooms to the pot. Roasting your vegetable scraps at 400°F for 20 minutes before simmering creates an incredibly rich, caramelized broth that's perfect for heartier soups.
Storage and Freezing Tips
Cool your broth completely in the refrigerator before transferring to freezer containers. I like freezing in 2-cup portions because most recipes call for that amount, and it thawed quickly when I need it in a pinch.
- Leave an inch of space at the top of containers since liquid expands when frozen
- Label with the date because frozen broth looks identical after months
- Ice cube trays are perfect for small portions when you just need a splash
 Save
Save  Save
Save Every batch tells the story of what you cooked that week, which is kind of beautiful when you think about it. Now go save those peels and make something wonderful.
Common Questions
- → Which vegetable scraps work best for homemade broth?
Onion skins, carrot peels, celery ends, leek tops, mushroom stems, garlic skins, and parsley stems create the most balanced flavor profile. These aromatics provide depth and richness without overpowering the broth.
- → Why should I avoid cruciferous vegetables in scrap broth?
Broccoli, cauliflower, Brussels sprouts, and cabbage contain sulfur compounds that can make broth taste bitter and unpleasant. Stick with sweeter vegetables and aromatic herbs for the cleanest flavor.
- → How long can I store vegetable scraps before making broth?
Collect scraps in a freezer-safe bag and store frozen for up to 3 months. Freezing actually helps break down cell structures, potentially releasing more flavor during cooking.
- → Can I customize the flavor profile of my scrap broth?
Absolutely. Add kombu seaweed or dried shiitake mushrooms for umami depth, or include fresh thyme, rosemary, and sage for herbaceous notes. The beauty of scrap broth is its versatility based on what you've cooked recently.
- → What's the best way to strain broth for clarity?
Use a fine-mesh sieve lined with cheesecloth for the clearest results. For ultra-clear broth, let the strained liquid settle for 10 minutes, then carefully pour off the top layer, leaving sediment behind.
- → How does homemade scrap broth compare nutritionally to store-bought?
Homemade broth typically contains less sodium and no preservatives or artificial flavors. While still low in calories, homemade versions capture more vitamins and minerals extracted from the vegetable scraps during simmering.